


Measure Windows: DIY approach or call in the professionals?

Key Takeaways:
- Measurement technique depends entirely on window type – casement and awning windows use a single trim-to-trim reading, while double-hung, single-hung, and sliding windows require three-point width and height readings, with the smallest value always controlling the order.
- Before ordering, cross-check measurements against IRC egress minimums (5.7 sq ft net opening), tempered glass triggers (within 18 inches of the floor, bathrooms, near doors), and NFRC-certified U-Factor/SHGC thresholds for your ENERGY STAR climate zone.
- Frame depth determines the replacement path: a minimum of 3.25 inches accommodates an OKNOPLAST insert replacement window, while anything less requires a full-frame replacement.
- DIY measurement works for standard, square windows within a 1/4-inch diagonal tolerance, but racked frames, bay/bow/specialty shapes, and OKNOPLAST tilt and turn systems call for certified contractor measurement to verify code compliance and installation planning.

How to Adapt Measurement Techniques to Different Window Types
Measurement technique isn’t one-size-fits-all – it changes depending on the window type. OKNOPLAST casement and awning windows call for a single center trim-to-trim measurement, while double-hung and single-hung units need three-point width and height readings where the smallest value drives the order. Bay and bow windows must be measured panel by panel, and tilt and turn windows demand a brick-to-brick aperture measurement to properly account for the multi-chamber uPVC frame.
Before picking up a tape measure, it helps to understand basic window anatomy. The jamb (vertical side frame), head jamb (top horizontal member), and sill (bottom horizontal member) define the interior boundary of the rough opening. Identifying these three components upfront eliminates the reference-point errors that lead to mis-ordered frames.
Casement and Awning Windows
For OKNOPLAST casement and awning windows, a single center trim-to-trim measurement covers both width and height – recorded from one jamb’s interior face to the opposite jamb, and from the sill up to the head jamb. Since these frames carry no sliding track, there’s no track-depth deduction to worry about; the trim-to-trim dimension transfers directly to the order specification.
Double-Hung and Single-Hung Windows
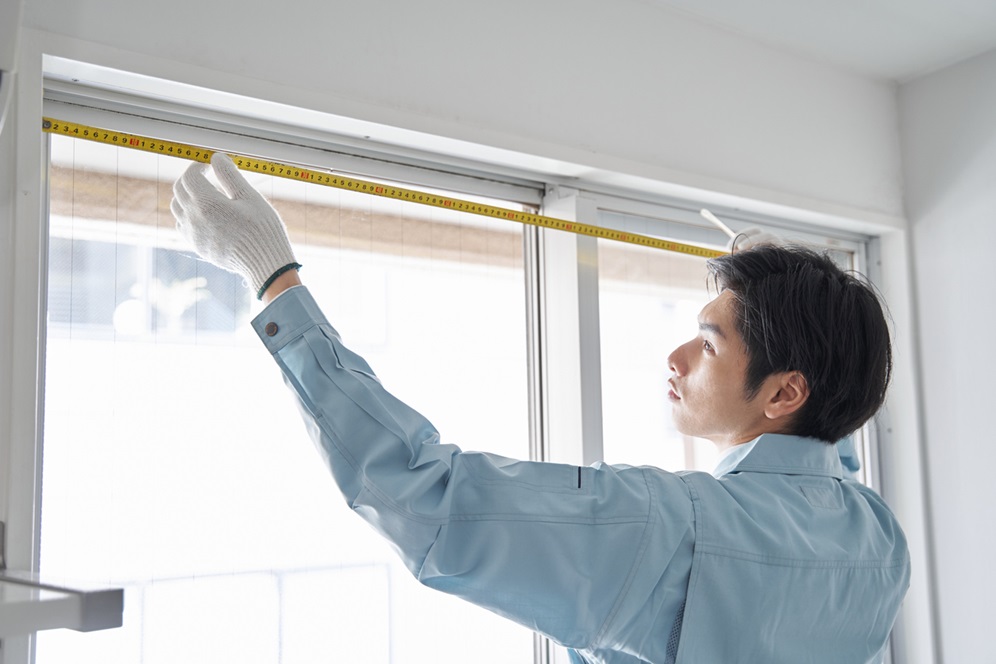
Double-hung and single-hung windows require three width readings taken between the inner jambs at the top, middle, and bottom, along with three height readings from the sill to the head jamb at the left, center, and right. In both cases, the smallest recorded value controls the order dimension – this prevents a frame from being too large to seat properly in a tapered or out-of-square opening.
Sliding Windows
Sliding windows follow the same three-point protocol as double-hung and single-hung units, with one important addition: the tape must stay taut and perfectly horizontal on every width pass. Even a slight sag or diagonal angle produces a false reading that overstates the true clear width.
Bay and Bow Windows
Because panel dimensions frequently vary across the same bay or bow unit, each panel must be measured individually at its center – width jamb-to-jamb, height trim-to-trim. Treating the entire assembly as a single opening leads to compounded sizing errors that multiply across every panel.
Tilt and Turn Windows
OKNOPLAST tilt and turn windows are built on multi-chamber uPVC profiles, so the rough opening must be measured brick-to-brick. This approach confirms frame square alignment and captures the full frame depth that standard trim-to-trim methods simply can’t account for.
Specialty Shapes
Arched, round, and trapezoidal windows need a diagonal measurement alongside standard width and height readings, plus frame square verification using either a framing square or the 3-4-5 triangle method. Confirming the opening is geometrically true before fabrication prevents irreversible cutting errors in custom sashes.
The “measure twice, cut once” principle applies across every window type – each dimension recorded in the first pass should be independently re-measured before submission to confirm accuracy.
| Window Type | Width Measurement Method | Height Measurement Method |
|---|---|---|
| Casement / Awning | Single center trim-to-trim between jambs | Single center trim-to-trim sill to head jamb |
| Double-Hung / Single-Hung | Three-point (top/middle/bottom) between inner jambs – smallest controls order | Three-point (left/center/right) sill to head jamb – smallest controls order |
| Sliding | Three-point between inner jambs, tape taut and horizontal | Three-point sill to head jamb – smallest controls order |
| Bay / Bow | Each panel measured separately at center, jamb-to-jamb | Each panel measured separately at center, trim-to-trim |
| Tilt and Turn | Brick-to-brick aperture width – confirms multi-chamber uPVC frame depth | Brick-to-brick aperture height – verifies frame square alignment |
How to Incorporate Building Code, Tempered Glass, and Egress Requirements into Measurements
Before ordering replacement windows, you’ll need to run through three essential building code checks: egress minimums (5.7 sq ft net opening, 24-inch height, 20-inch width), tempered glass location triggers (within 18 inches of the floor, in bathrooms, and adjacent to doors), and NFRC-certified U-factor/SHGC thresholds for your ENERGY STAR climate zone. OKNOPLAST uPVC systems satisfy all three and qualify for the 25C federal tax credit of up to $600 per unit.
IRC egress requirements call for a minimum net clear opening of 5.7 sq ft in above-grade sleeping rooms (5.0 sq ft at ground level), with at least 24 inches of clear height and 20 inches of clear width. These dimensions must be cross-checked against rough opening measurements before placing any order. A window that’s perfectly plumb, level, and square still can’t legally serve as a sleeping room exit if it falls short of egress minimums – which makes this verification step non-negotiable.
Tempered glass requirements under the IRC are triggered by location, so they’re best identified during the installation inspection before window dimensions are locked in. Any glazing within 18 inches of the floor, in bathrooms, beside doors, or in other hazardous spots must use tempered or safety glass. Catching these locations at the measurement stage – rather than after ordering – avoids expensive glazing substitutions and keeps everything aligned with manufacturer specifications from the start.
NFRC-certified U-factor and SHGC thresholds shift depending on your ENERGY STAR climate zone: the Northern zone requires a U-factor of ≤ 0.27, while Southern and South-Central zones call for an SHGC of ≤ 0.25. Confirming these values during the specification stage keeps you on the right side of local energy code. For hurricane-prone areas, OKNOPLAST uPVC windows are tested to 80 psf per ASTM E330/E330M-14 (PAVA system); the PIXEL system reaches DP-90 for specific configurations per Florida Product Approval.
| Code Requirement | IRC Threshold | Measurement Action Required |
|---|---|---|
| Egress | 5.7 sq ft net opening (5.0 sq ft ground floor); 24-inch min. height; 20-inch min. width | Verify net clear opening against rough opening dimensions before ordering replacement windows |
| Tempered Glass | Required within 18 inches of floor, bathrooms, adjacent to doors, hazardous locations | Identify trigger locations during installation inspection; confirm glazing type before finalizing window dimensions |
| U-factor / SHGC | U-factor ≤ 0.27 (Northern zone); SHGC ≤ 0.25 (Southern + South-Central zones) | Confirm NFRC-certified ratings at specification stage to meet ENERGY STAR zone thresholds and qualify for 25C tax credit up to $600/unit |
The 25C Energy Efficient Home Improvement Credit – worth up to $600 per unit – is tied directly to the measurement and specification stage, since glazing performance must be verified through NFRC certification before submitting your order. OKNOPLAST uPVC windows are available in triple-pane argon fill configurations and carry NFRC-certified ratings that meet ENERGY STAR standards across all four US climate zones (Northern, North-Central, South-Central, and Southern), meaning tax credit eligibility comes down to getting the specification right from the moment of measurement.
How to Estimate Replacement Window Cost Using Accurate Measurements
OKNOPLAST replacement windows are custom-manufactured to submitted measurements, meaning accuracy isn’t just good practice – it directly controls what you pay. Five measurement-derived data points shape the final estimate: rough opening dimensions, frame depth, glazing specification, ENERGY STAR zone qualification (25C credit up to $600/unit), and any customization options selected.
Because these are bespoke, non-returnable units built to exact specification, a measurement error doesn’t trigger a return – it triggers a remade order at full cost. Every measurement recorded on the measurement worksheet translates into a line item on your budget, making width and height the very first cost-control decisions in the replacement process.
The measurement worksheet captures three data points per dimension: the smallest of three width readings across the rough opening, the smallest of three height readings top-to-bottom, and frame depth (minimum 3.25 inches for an insert replacement). Squareness is then confirmed via diagonal measurement, completing the data set needed for an unambiguous, accurate cost estimate submission.
Glazing specification also doubles as a cost offset strategy. The NFRC-certified U-factor of the unit you select determines ENERGY STAR climate zone qualification, which in turn activates the 25C Energy Efficient Home Improvement Credit – up to $600 per qualifying unit. Triple-pane argon-fill units meet the Northern zone threshold, while double-pane configurations satisfy South-Central and Southern zone requirements, so choosing the right configuration is both a performance and a financial decision.
| Cost Driver | Measurement Data Required | Impact on Price |
|---|---|---|
| Dimensions (window width × window height) | Smallest of three width measurements + smallest of three height measurements from rough opening | Determines unit size; larger openings increase material and glazing area cost directly |
| Frame Depth | Depth of existing frame (min. 3.25 in. for insert replacement window) | Insufficient depth requires full-frame replacement, increasing labor and material cost |
| Glazing Specification | ENERGY STAR climate zone + NFRC U-factor target (double-pane vs. triple-pane argon fill) | Triple-pane raises unit price; qualifies for 25C credit up to $600/unit, reducing net cost |
| Customization Options | Shape (arched, round, trapezoidal) + color finish selection (50+ finishes) | Specialty shapes and non-standard finishes carry a price premium over standard rectangular units |
Professional installation labor rounds out the budget as a fifth variable – one directly influenced by what the measurement worksheet reveals. Rough opening condition, squareness deviation, and frame depth all affect installation complexity and time on-site. Flagging non-square openings at the worksheet stage gives contractors the opportunity to plan accordingly, eliminating cost surprises before the order is even placed.
How to Decide Between DIY Measurements and Certified Contractor Services
DIY measurement works well for standard window types – casement, double-hung, and sliding – provided the existing frame is plumb, level, and square within a 1/4-inch diagonal tolerance. For racked frames, bay or bow windows, specialty shapes, or OKNOPLAST tilt and turn systems that require code-compliant installation verification, a certified contractor is the smarter call.
DIY Pathway: 3 Conditions That Make It Viable
Going the DIY route is realistic only when three conditions are met at once. The existing frame must be plumb, level, and square – opposing corner diagonals should vary by no more than 1/4 inch. The window itself must be a standard type: casement, double-hung, single-hung, or sliding. Finally, you’ll need to take three width measurements (head jamb, mid-frame, and sill) alongside three height measurements, recording the smallest value in each direction to nail the rough opening size.
OKNOPLAST offers printable measurement worksheets and step-by-step guides to keep the DIY process on track, significantly lowering the chance of ordering errors on standard insert replacements.
Contractor Pathway: 4 Triggers That Require Professional Measurement
Bring in a certified contractor when any one of these four situations applies:
- a racked or out-of-square frame that calls for full-frame replacement rather than a simple insert,
- egress requirements or tempered glass specs that need IRC verification,
- a bay, bow, or specialty-shaped window demanding complex multi-panel measurement,
- an OKNOPLAST tilt and turn system with multi-chamber uPVC profiles requiring professional code-compliant installation per local building authority.
Beyond precise measurements, a professional inspection covers NFRC-certified U-factor and SHGC verification for ENERGY STAR climate zone compliance – and confirms 25C Energy Efficient Home Improvement Credit eligibility before you place an order, something no DIY approach can replicate.
Scenario Decision Table
| Scenario | DIY or Contractor | Reason |
|---|---|---|
| Square frame + standard window type (casement, double-hung, sliding) | DIY | Frame diagonal tolerance ≤ 1/4 inch; measure head jamb, mid-frame, sill; record smallest value |
| Racked or out-of-square frame | Certified Contractor | Full-frame replacement required; IRC compliance and structural verification needed |
| Bay window, bow window, or specialty shape | Certified Contractor | Complex multi-panel measurement; NFRC-certified SHGC and ENERGY STAR zone verification required |
| OKNOPLAST tilt and turn uPVC system | Certified Contractor | Multi-chamber uPVC profile requires code-compliant professional installation and 25C credit eligibility confirmation |
The “measure twice, cut once” principle holds true whether you’re going DIY or hiring a pro – but a certified contractor adds a critical verification layer that covers NFRC ratings, ENERGY STAR climate zone compliance, and 25C tax credit documentation, none of which a DIY measurement can provide.

How to measure window width accurately between jambs for replacement windows?
To get an accurate width for replacement windows, take three horizontal measurements between the inner jambs – at the top, middle, and bottom of the opening. Use the smallest of these values, then subtract 1/4 to 3/8 inch for installation clearance.
Three-point measurement between inner jambs
Window openings are rarely perfectly rectangular – settling, racking, or previous installation shifts mean the width at the top, middle, and bottom can differ by 1/4 inch or more. That’s why three measurements are essential rather than just one. The inner jamb is the vertical side piece of the existing frame, running top to bottom on each side of the opening. Keep your tape measure straight and taut at each height; even a slight diagonal will produce a false reading and result in an oversized order. For wider openings where tape sag becomes a concern, a window measuring helper improves reliability.
Smallest-measurement rule and tolerance deduction
The narrowest of your three readings controls the order size – a window cut to the largest measurement simply won’t pass through the tightest point of the opening. Subtract 1/4 to 3/8 inch from that smallest value to arrive at your final order width. This clearance is required for shimming, leveling, and sealing the frame per manufacturer installation instructions and local building code.
Insert vs. full-frame decision and squareness check
Before finalizing your width, confirm the existing jambs are plumb and free of rot – both are prerequisites for an insert replacement. To check squareness, compare the two diagonal measurements across the opening; a difference of 1/4 inch or less means the frame is suitable for an insert. If the opening is racked or the jambs have deteriorated, a full-frame replacement is necessary, and you’ll measure the rough opening width instead.
| Measurement Step | Action | Tool / Reference |
|---|---|---|
| Measure top, middle, and bottom width | Take three horizontal measurements between inner jambs, tape straight and taut at each height | Tape measure; window measuring helper for wide openings |
| Record the smallest measurement | Identify the narrowest of the three readings – this is the controlling dimension for ordering | Tape measure reading; written record |
| Deduct installation tolerance | Subtract 1/4 to 3/8 inch from the smallest measurement to allow shimming, leveling, and sealing | Manufacturer installation clearance requirement per local building code |
How to measure window height accurately from sill to head jamb for replacement windows?
To measure window height correctly, take three vertical readings – left, center, and right – from the interior sill (stool) to the head jamb. Use the smallest of the three, then subtract 1/4 to 3/8 inch for installation clearance.
Quick Answer (PAA): Take three vertical measurements – left, center, right – from the interior sill (stool) to the head jamb. Record the smallest value, then subtract 1/4 to 3/8 inch for installation clearance.
| Measurement Step | Action | Reference Point |
|---|---|---|
| Left measurement | Hold tape measure vertically taut from sill to head jamb at left side of frame | Interior sill (stool) bottom – head jamb top |
| Center measurement | Repeat vertical tape measure at center of frame opening | Interior sill (stool) bottom – head jamb top |
| Right measurement | Repeat vertical tape measure at right side of frame opening | Interior sill (stool) bottom – head jamb top |
Frames are rarely perfectly square – settling, framing inconsistencies, or prior installation shifts can make an opening taller or narrower on one side. That’s exactly why three measurement points are necessary. Have a helper hold one end of the tape at the interior sill while you read the other end at the head jamb, keeping the tape vertically taut at each position.
Window anatomy precision matters: the interior sill (also called the stool) is the horizontal bottom structural component that provides water protection and support, serving as your lower reference point. The head jamb – the horizontal top piece of the window frame, distinct from the structural header above it – is your upper reference. Mixing up the head jamb with the rough opening header can introduce 1.5–3.5 inches of error into your recorded height.
Always base your order on the smallest of the three measurements. Using the largest risks a unit that won’t clear the frame’s tightest point, while the smallest guarantees the replacement window fits without issue.
Before ordering, subtract 1/4 to 3/8 inch from that smallest measurement. This clearance is essential for shimming, leveling, and sealing per manufacturer installation instructions and local building code – skip it, and the unit may bind or leave no room for proper weatherproofing.
This sill-to-head-jamb approach applies specifically to insert (pocket) replacement installations. For full-frame replacements or new construction, you’d instead use the exterior brick-to-brick aperture, which reflects the rough opening dimension. Either way, verify squareness before finalizing your data – compare diagonal measurements, and a difference of 1/4 inch or less confirms insert replacement is viable.

How to measure window frame depth to ensure proper fit for insert replacement windows?
Window frame depth must be at least 3.25 inches to accommodate an OKNOPLAST insert replacement window with its multi-chamber uPVC profile – measure at sill, mid-jamb, and head jamb using a tape measure or depth gauge; if depth is less than 3.25 inches anywhere, full-frame replacement is required.
Frame depth runs from the interior face of the interior stop to the exterior face of the exterior blind stop. Take three readings – at the sill, mid-jamb, and head jamb – using a tape measure or depth gauge. For an OKNOPLAST multi-chamber uPVC insert, the minimum required depth is 3.25 inches.
What frame depth measures and where to place the tape measure
Frame depth is essentially the cavity your insert window must fit into – spanning from the interior stop’s face to the exterior blind stop. Rest the tape measure or depth gauge flat against the interior stop, extend it to the blind stop at the sill, then repeat at mid-jamb and head jamb. The smallest of those three readings determines whether an insert window is viable at all.
| Depth Measurement Point | Location | Minimum Required |
|---|---|---|
| Sill | Bottom horizontal frame member, interior stop to exterior blind stop | 3.25 inches |
| Mid-Jamb | Vertical side frame at mid-height, interior stop to exterior blind stop | 3.25 inches |
| Head Jamb | Top horizontal frame member, interior stop to exterior blind stop | 3.25 inches |
The 3.25-inch threshold and consequences of insufficient depth
OKNOPLAST multi-chamber uPVC profiles need at least 3.25 inches of frame depth to seat properly, leaving enough room for shimming and sealing with low-expanding foam or backer rod and perimeter sealant per manufacturer installation instructions. If even one reading falls short, the existing frame simply can’t house the uPVC profile – full-frame replacement becomes the only option. That path carries higher material and labor costs, so getting your measurements right from the start has a direct impact on the project budget. While you’re measuring, take a close look at both stop faces for rot, water damage, or any structural issues – any problems there need a contractor’s evaluation before finalizing window dimensions.

What are the differences between DIY window measurement and certified contractor measurement?
DIY window measurement covers the three-point width, height, and diagonal squareness checks a homeowner can perform with a tape measure on a standard, square window. Certified contractor measurement adds IRC egress and tempered glass verification, NFRC/ENERGY STAR confirmation, and a code-compliant installation plan – required for racked frames, bay/bow/specialty shapes, and OKNOPLAST tilt and turn systems.


Let’s talk about your project!
Request a quote, discuss specifications, or get help choosing the right system
Send a request
"*" indicates required fields