


What is a nail flange in modern windows?


A nail flange, also called a nailing fin, is a thin flat strip that extends outward from a window frame and is fastened directly to the wall sheathing or framing to anchor the window in place. It is one of three installation methods OKNOPLAST uses across its U.S. window systems – Nailing Fin, Fixing Clip, and Direct Bolt – each suited to a different wall type and construction scenario. OKNOPLAST PAVA windows ship with an integrated nailing fin at a 3 1/4″ frame installation depth, while PIXEL uses a 2 3/4″ depth, per OKNOPLAST product catalog documentation.
Key Takeaways:
- A nail flange (nailing fin) is a strip extending from the window frame, fastened to wall sheathing to anchor and help seal the window opening.
- U.S. window frames fall into three broad categories – nail fin (flanged), block frame (no flange), and flush fin – and OKNOPLAST’s Nailing Fin, Fixing Clip, and Direct Bolt methods map onto that industry terminology.
- IRC Section R703.4 requires flashing at window and door openings to follow the manufacturer’s installation instructions, applied shingle-fashion to shed water outward at every layer.
- OKNOPLAST offers three named installation methods: Nailing Fin (new construction, wood-frame walls), Fixing Clip (brick buildings), and Direct Bolt (replacement windows).
- PAVA’s integrated nailing fin sits at a 3 1/4″ frame installation depth; PIXEL’s sits at 2 3/4″.
- European-style installation without a nail flange typically relies on through-frame anchors or dowels rather than a flange fastened to sheathing.
- uPVC Brickmould is available in two configurations – Brickmould Tapee 4 Sides and Brickmould Tapee 3 Sides and Windowsill – in frame depths from 1 1/8″ to 4 1/4″.
- Proper sealing and flashing at the nail flange perimeter matters as much as the flange itself – an unsealed flange does not stop air or water infiltration on its own.

What Is a Nail Flange (Nailing Fin), and How Does It Work?
A nail flange is a thin, flat strip of material extending outward from the perimeter of a window frame, typically running continuously along the top, bottom, and both sides. During installation, the flange is fastened directly to the wall sheathing or framing with nails or screws, which anchors the window to the structure and distributes its weight across the surrounding framing rather than relying on the frame alone.
Beyond anchoring, the nail flange forms part of the water-management path at the window opening. Installed correctly and integrated with flashing tape or membrane at the head, jambs, and sill, the flange helps direct water down and away from the rough opening rather than into the wall cavity. The flange itself is not a complete weatherproofing system – it works in conjunction with flashing, sealant, and correct shingle-lap sequencing (flanges and flashing layered so water sheds outward at each course) to control air and water infiltration at the perimeter.
OKNOPLAST PAVA and PIXEL uPVC windows both ship with an integrated nailing fin – molded as part of the uPVC frame profile itself rather than a separate strip applied afterward – and pre-drilled mounting holes as standard. Both systems can alternatively be ordered without a nailing fin for use with uPVC Brickmould or fixing-clip installation.
Nail Fin vs. Block Frame vs. Flush Fin: How Window Frame Types Compare
U.S. window manufacturers generally group frame designs into three categories – nail fin (also called flanged), block frame (no flange), and flush fin – and understanding which category a product falls into matters more for installation planning than the brand name on the window. A nail fin frame is fastened through a flange into open sheathing before siding goes on, a block frame has no flange and is fastened through the frame itself into the rough opening, and a flush fin (sometimes called Z-bar) sits flush with the exterior finish and is common on stucco retrofit projects.
| Industry Term | Flange? | Typical Project | Closest OKNOPLAST Method |
|---|---|---|---|
| Nail fin (flanged) | Yes, fastened to sheathing | New construction, before siding | Nailing Fin |
| Block frame | No flange | Replacement, masonry, retrofit | Direct Bolt or Fixing Clip |
| Flush fin (Z-bar) | Flush vinyl fin, not nailed to sheathing | Stucco retrofit | uPVC Brickmould over Direct Bolt or Fixing Clip |
OKNOPLAST’s three methods map onto this broader industry framework rather than replacing it: Nailing Fin installation is OKNOPLAST’s version of a standard nail fin frame, Direct Bolt and Fixing Clip both function as block-frame installations without a flange, and pairing either of those with uPVC Brickmould produces a finished, trimmed exterior similar in appearance to a flush-fin retrofit. Confirming which category a wall and project fall into – new construction with open sheathing, masonry, or a finished stucco or siding retrofit – is the fastest way to narrow down which OKNOPLAST method applies before comparing specific products.
Nailing Fin vs. Fixing Clip vs. Direct Bolt: OKNOPLAST’s Three Installation Methods
OKNOPLAST windows install using one of three methods – Nailing Fin, Fixing Clip, or Direct Bolt – selected according to wall construction and whether the project is new construction or a replacement. Nailing Fin installation is suited to wood-frame walls, where anchors and screws through the frame itself are not needed. Fixing Clip installation is the classic method for brick buildings, where nailing into the wall is not practical. Direct Bolt installation is the fastest of the three, using through-frame screws, and is typically used on replacement projects.
| Method | Wall Type | Fastening | Typical Use |
|---|---|---|---|
| Nailing Fin | Wood-frame construction | Nails or screws through the integrated flange into sheathing | New construction and renovations |
| Fixing Clip | Brick and masonry buildings | Metal clips fastened to the frame and anchored to the wall | New construction where nailing is impractical |
| Direct Bolt | Existing openings (replacement) | Through-frame bolts, two screw types available | Replacement windows |
All three methods are available across OKNOPLAST’s uPVC (PAVA, PIXEL) and aluminum (MIRU EVO) window lines, per OKNOPLAST assembly technique documentation. OKNOPLAST installation materials describe Direct Bolt as the fastest of the three methods – a relevant factor when a project’s timeline is driven by occupied-home replacement work rather than new construction, since it fastens through the frame with screws rather than requiring the flange access that Nailing Fin installation depends on.
See the products

Nail Flange Depth by System: PAVA, PIXEL, and MIRU EVO
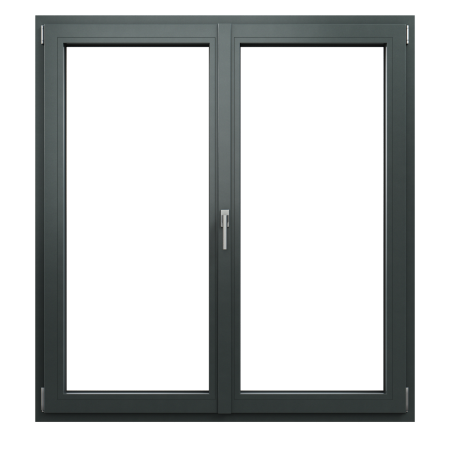
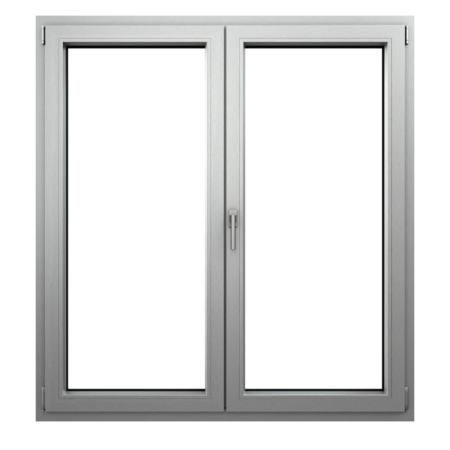
OKNOPLAST PAVA’s integrated nailing fin sits at a 3 1/4″ frame installation depth, PIXEL’s sits at 2 3/4″, and the aluminum MIRU EVO line runs from 2 15/16″ to 4 1/8″ depending on model. That difference affects how each system aligns with a given wall’s sheathing plane: MIRU EVO Standard uses a 2 15/16″ frame installation depth with its own integrated nailing fin, while MIRU EVO Steel uses a deeper 4 1/8″ profile.
| System | Material | Frame Installation Depth | Nailing Fin |
|---|---|---|---|
| PAVA | uPVC | 3 1/4″ | Integrated, pre-drilled |
| PIXEL | uPVC | 2 3/4″ | Integrated, pre-drilled |
| MIRU EVO Standard | Aluminum | 2 15/16″ | Integrated, pre-drilled |
| MIRU EVO Steel | Aluminum | 4 1/8″ | Integrated, pre-drilled |
Frame installation depth determines how the nailing fin lines up relative to the wall’s exterior sheathing and, on a retrofit, how much shimming or furring may be needed to bring the flange flush with the weather-resistive barrier. Confirming installation depth against the specific wall assembly on a project – not just the nominal window size – is a standard step before finalizing which OKNOPLAST system and installation method to specify.
Nail Flange vs. European Anchor Installation
Nail flange installation – the standard U.S. residential method for decades – fastens the window directly to sheathing through an integrated flange, while European-style installation more commonly uses through-frame anchors or dowels set into the rough opening instead of a flange. That through-frame anchor approach is the installation path behind OKNOPLAST’s Fixing Clip and Direct Bolt methods, both of which remain widely familiar options for contractors even without a nailing flange.
Windows installed without a nail flange are not inherently less weathertight – the water-management role a flange plays is instead handled through flashing membrane at the sill and jambs, continuous sealant at the perimeter, and, on many European-profile systems, multi-chamber frame construction and internal drainage paths within the sash itself. The right choice between a flanged and non-flanged installation depends on the wall type, whether the project is new construction or replacement, and which OKNOPLAST installation method – Nailing Fin, Fixing Clip, or Direct Bolt – fits the opening.
uPVC Brickmould: Dimensions, Product Options, and Color Matching
OKNOPLAST uPVC Brickmould is available in two configurations – Brickmould Tapee 4 Sides and Brickmould Tapee 3 Sides and Windowsill – in frame depths ranging from 1 1/8″ to 4 1/4″ to match the window opening depth. Brickmould is a separate trim component bolted to the window frame on-site rather than an integrated flange, and it is color-matched to the window frame for a finished exterior appearance.
| Option | Configuration | Frame Depth Range |
|---|---|---|
| Brickmould Tapee 4 Sides | Framing on all four sides of the opening | 1 1/8″ – 4 1/4″ |
| Brickmould Tapee 3 Sides and Windowsill | Head and jambs, with a sill piece at the bottom | 1 1/8″ – 4 1/4″ |
uPVC Brickmould is manufactured exclusively for OKNOPLAST’s uPVC PAVA and PIXEL tilt and turn windows and is cut at a 45° angle at the corners for a mitered, finished joint. Because it is a separate on-site component rather than an integrated flange, Brickmould works on projects specified without a nailing fin – including Fixing Clip and Direct Bolt installations – where the exterior trim detail still needs to read as a finished, traditional profile rather than a flush European reveal. Published OKNOPLAST documentation describes this uPVC Brickmould as exclusive to the PAVA and PIXEL lines; confirm with your OKNOPLAST representative whether an equivalent trim option exists for aluminum MIRU EVO windows, since a dedicated aluminum brickmould specification was not available in the documentation reviewed for this article.

Building Code Requirements for Window Flashing: IRC R703.4 and Pan Flashing
IRC Section R703.4 requires flashing at every exterior window and door opening, including pan flashing with upturned end dams at the sill under R703.4.1, installed per the fenestration manufacturer’s instructions. The code requires flashing to be applied shingle-fashion – layered so each course sheds water onto the one below it – and to extend to the surface of the exterior wall finish or lap onto the water-resistive barrier for continued drainage.
Pan flashing is a continuous, sloped flashing with upturned end dams at each jamb, installed to catch any water that gets past the glazing seal or frame and direct it back out through weep points rather than onto the rough sill framing – a requirement the 2021 IRC made explicit rather than merely implied in earlier editions. Without pan flashing, water that reaches the sill has nowhere to go but into the framing below it, which is a common source of hidden rot on projects where a flange or clip was installed correctly but the sill detail was skipped. Self-adhered flashing membranes used at the flange or clip perimeter are required to comply with AAMA 711, and fluid-applied flashing membranes with AAMA 714 – both cited directly in the code language governing window flashing installation.
These code requirements apply regardless of which OKNOPLAST installation method is specified: Nailing Fin, Fixing Clip, and Direct Bolt installations are all still subject to R703.4’s flashing and pan-flashing requirements, since the code addresses the wall-to-window water management detail rather than any one fastening method specifically.
Installation Best Practices: Sealing, Flashing, and Shimming
A nail flange or fixing clip only performs as well as the sealing and flashing detail around it – EPA guidance for window installation instructions specifically calls out shimming for a flush, level, and plumb fit and sealing at the product-wall interface as required elements of a proper installation. That guidance also distinguishes between pocket installation, rough-opening installation with exterior sheathing intact, and rough-opening installation with sheathing removed, since the correct flashing sequence differs across all three scenarios.
In practice, that means the nailing fin or fixing clip gets fastened first. Flashing membrane is then applied over the flange at the sides and head in a shingle-lap sequence, so each layer sheds water onto the layer below it, never the reverse. Gaps between the rough opening and the window frame need to be shimmed to keep the frame square and prevent it from bowing under fastener tension. Interior and exterior perimeter gaps get sealed separately: exterior sealant manages bulk water, while interior sealant and backer rod manage air leakage and condensation risk. Skipping any one of these steps can leave a correctly specified window performing well below its rated air infiltration and water-resistance values.
Common Nail Flange Installation Mistakes
Taping the flange to the water-resistive barrier without a separate head-flashing detail is a common mistake, since a simple WRB flap over the flange does not extend the required 2-3 inches past each jamb that most manufacturer instructions call for. Reversing the shingle-lap sequence – running jamb flashing over the head flashing instead of under it – is a second common error that lets water run behind the flashing at the top corners instead of over it.
- Skipping pan flashing at the sill – water that gets past the glazing seal has nowhere to drain and saturates the rough sill framing instead.
- Fastening the flange without shimming behind it – an unshimmed flange can pull the frame out of square as fasteners are driven, straining the sash and hardware.
- Using the wrong flashing tape chemistry against the frame material – some self-adhered tapes are not compatible with certain vinyl or aluminum surfaces and can fail to bond over time.
- Caulking instead of flashing – sealant manages small gaps but is not a substitute for shingle-lapped flashing membrane at the head, jambs, and sill.
- Leaving the flange unfastened at the corners – corner areas see the highest wind and water load and are the most common point of flange failure when fasteners are skipped or spaced too far apart.
Choosing the Right Installation Method for Your Project
New construction on a wood-frame wall is the clearest case for Nailing Fin installation, since the flange fastens directly to open sheathing before the weather-resistive barrier and siding go on. Brick and masonry construction points toward Fixing Clip installation, since there is no continuous sheathing plane to nail into, and occupied-home replacement projects generally favor Direct Bolt installation, since it does not require removing existing exterior trim to access the fastening points.
Projects that want a traditional, trimmed exterior appearance without an integrated flange – common when matching an existing brickmould reveal on a replacement, or when a European-profile window is being installed in a wall originally designed for a flanged product – can pair Fixing Clip or Direct Bolt installation with separate uPVC Brickmould rather than relying on an integrated nailing fin. Confirming wall type, project type (new construction vs. replacement), and desired exterior trim detail before specifying a system is the fastest way to land on the right combination of OKNOPLAST window system and installation method.
FAQ
A nail flange, also called a nailing fin, is a thin flat strip extending from the window frame perimeter that is fastened directly to wall sheathing or framing to anchor the window and support the flashing and sealing detail around the opening.
Nail flange and nailing fin describe the same component – the terms are used interchangeably in U.S. window installation, including in OKNOPLAST’s own product documentation.
OKNOPLAST offers three installation methods: Nailing Fin for wood-frame new construction, Fixing Clip for brick and masonry buildings, and Direct Bolt for replacement windows, available across both the uPVC and aluminum window lines.
OKNOPLAST PAVA’s integrated nailing fin sits at a 3 1/4″ frame installation depth, per OKNOPLAST product catalog documentation.
OKNOPLAST PIXEL’s integrated nailing fin sits at a 2 3/4″ frame installation depth, per OKNOPLAST product catalog documentation.
Not typically, european-style installation more commonly uses through-frame anchors or dowels set into the rough opening rather than a nailing flange fastened to sheathing, which is the basis for OKNOPLAST’s Fixing Clip and Direct Bolt methods.
Not inherently. Windows installed without a nail flange rely on flashing membrane, continuous perimeter sealant, and the window’s own frame and drainage design to manage water and air infiltration instead of the flange itself.
uPVC Brickmould is a separate trim component bolted to the window frame on-site, available in frame depths from 1 1/8″ to 4 1/4″ in two configurations: Brickmould Tapee 4 Sides and Brickmould Tapee 3 Sides and Windowsill.
Yes, brickmould is a separate on-site component rather than an integrated flange, so it works with Fixing Clip or Direct Bolt installations as well as Nailing Fin installations.
The nail flange anchors the window, but flashing membrane, continuous sealant, and correct shimming manage the actual air and water infiltration at the opening – a correctly rated window can underperform its tested values if any one of those steps is skipped during installation.
A nail fin window has a flange fastened to open wall sheathing before siding goes on, typically for new construction; a block frame window has no flange and is fastened through the frame itself into the rough opening, typically for replacement or masonry projects.
IRC Section R703.4 requires flashing at window and door openings installed per the manufacturer’s instructions, applied shingle-fashion so each layer sheds water onto the one below it, with pan flashing at the sill required under R703.4.1.
Pan flashing is a continuous, sloped flashing with upturned end dams installed at a window sill to catch water that gets past the glazing seal or frame and direct it back out, rather than letting it reach the rough sill framing and cause hidden rot.
Taping the flange to the water-resistive barrier without a separate head-flashing detail is a common mistake, since a WRB flap alone typically doesn’t extend the 2-3 inches past each jamb that manufacturer instructions call for.
Direct Bolt installation is generally the fastest method for replacement projects, since it uses through-frame bolts and does not require removing existing exterior trim to access the fastening points.





Let’s talk about your project!
Request a quote, discuss specifications, or get help choosing the right system
Send a request
"*" indicates required fields